Implement Local Deployment of DeepSeek in Three Steps: Say Goodbye to Server Crashes!
Introduction
In recent years, the Chinese model DeepSeek has garnered significant attention, but with the surge in user traffic, issues such as slow responses and system crashes have become more frequent, causing some inconvenience for users.
Fortunately, as an open-source model, DeepSeek allows developers to solve this problem by deploying it locally. Once deployed on your local machine, users can perform inference operations anytime without relying on internet connectivity, which not only enhances the user experience but also significantly reduces dependence on external services.
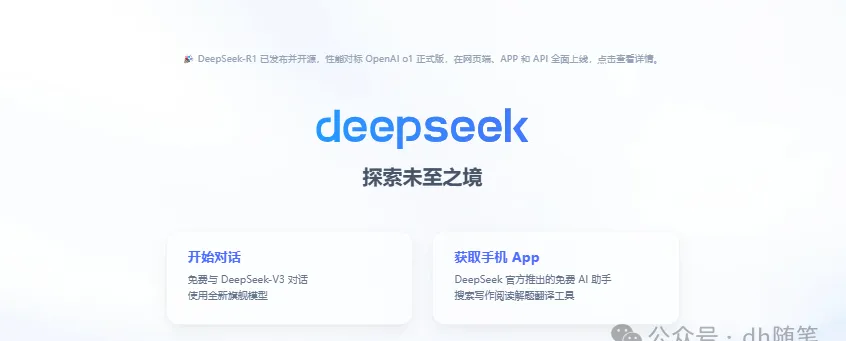
Three steps to implement local deployment of DeepSeek and bid farewell to server crashes:
1. Install Ollama;
2. Download the DeepSeek model;
3. Download the visual AI tool;
Step 1: Install Ollama
To run DeepSeek locally, we need to use Ollama—a free and open-source local large language model runtime.
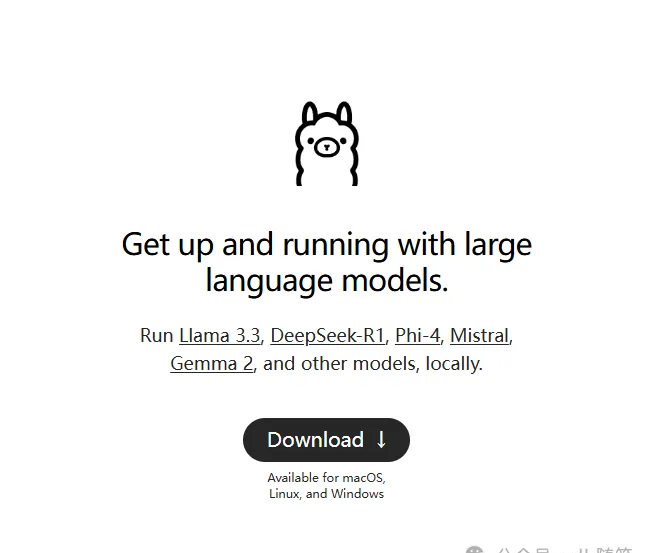
First, visit the Ollama official website to download the tool. The official site provides installation packages for different operating systems, allowing users to choose the version that matches their computer’s OS. In this example, we select the version suitable for Windows.
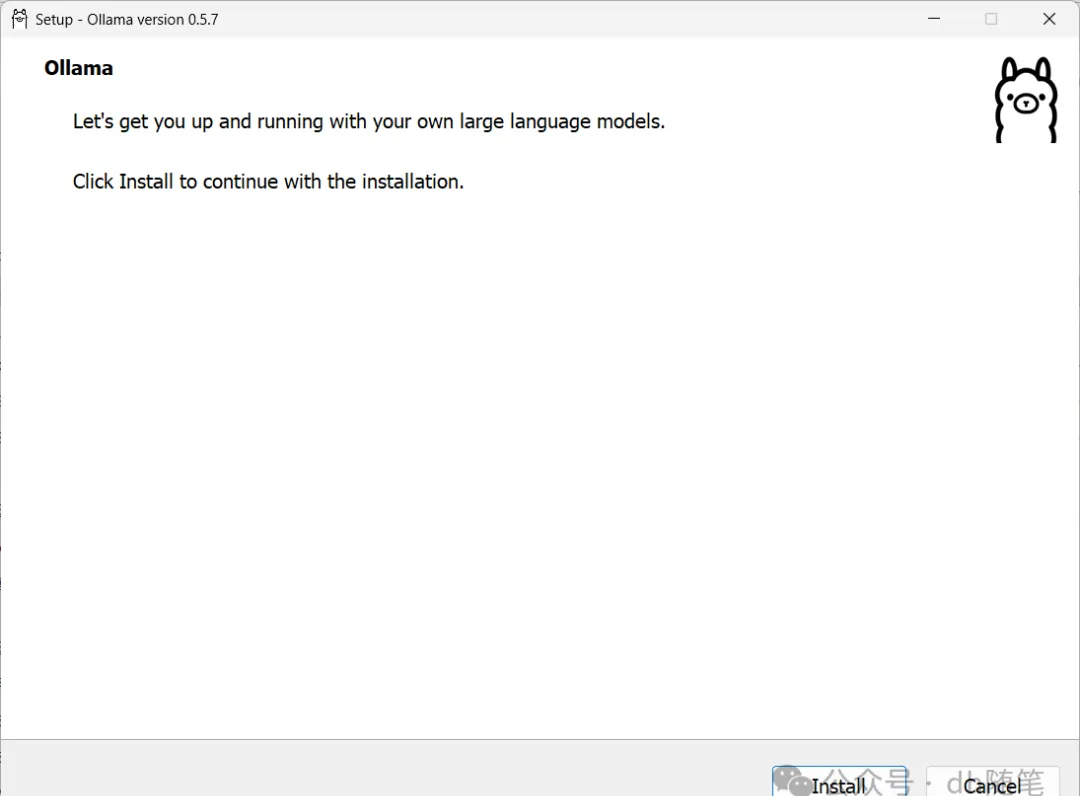
After downloading the Ollama installer, double-click on ‘install’ to start the installation process. The installation speed is relatively fast. Note: Install directly to C drive.
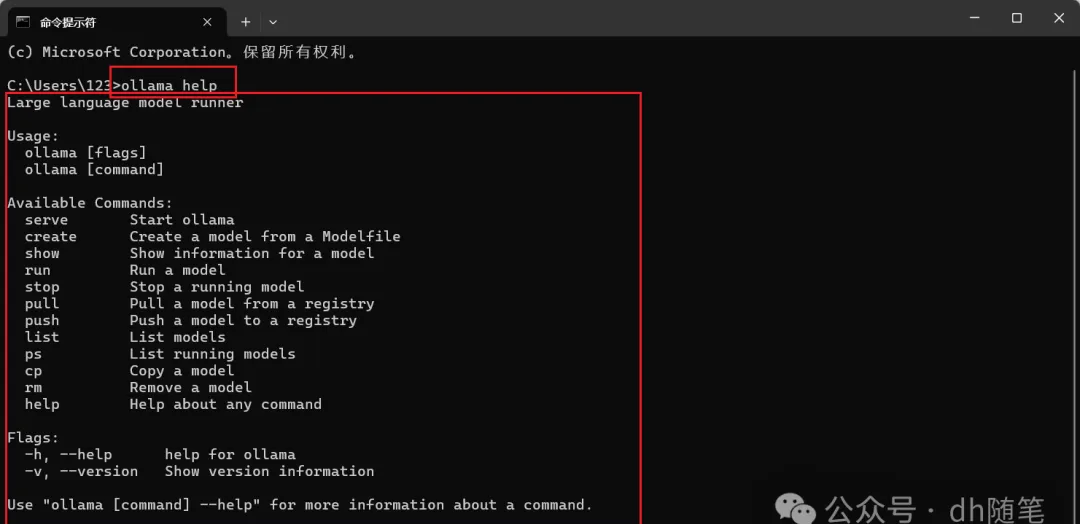
After completing the installation of Ollama, open your computer’s CMD (Command Prompt). Simply type “cmd” in the search bar at the bottom of your computer and press Enter to open the Command Prompt window. Type [ollama help].
Section 2: Download and Deploy Deepseek Model
Returns to the Ollama official website, in the search bar at the top of the webpage, type “DeepSeek-R1”. This is the model we will deploy locally.

After clicking on “DeepSeek-R1”, you will enter the model’s detail page, where multiple selectable parameter sizes will be displayed. Each parameter size represents the different sizes and computing capabilities of the model, ranging from 1.5B to 671B. Here, “B” stands for “Billion”, meaning “billion”, so:
• 1.5B indicates that the model has 1.5 billion parameters, suitable for lightweight tasks or devices with limited resources.
• 671B represents a model with 671 billion parameters, which has an extremely powerful model size and computing power, suitable for large-scale data processing and high-precision tasks, but also requires higher hardware specifications.
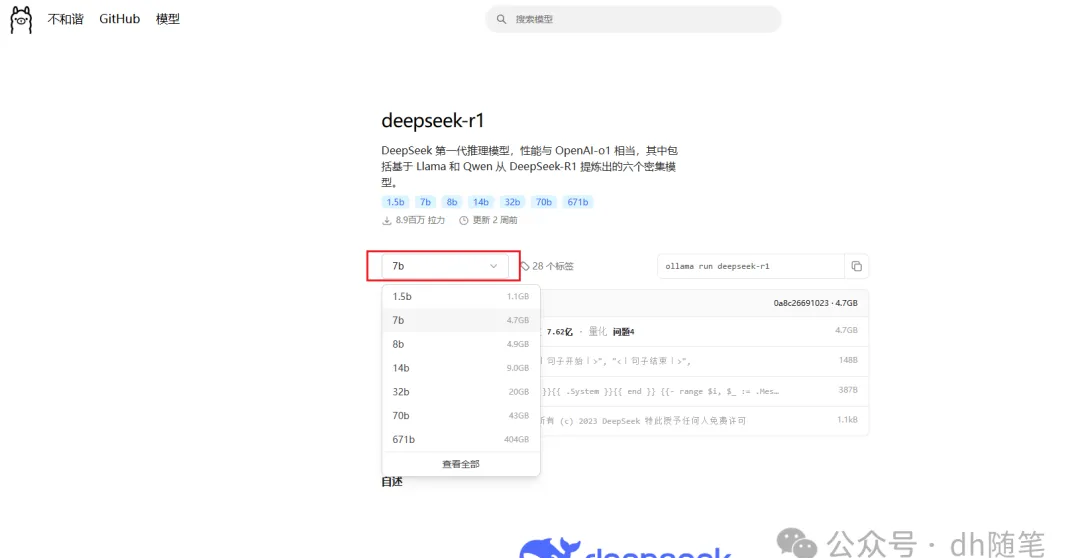
Selecting different parameter sizes allows you to choose which version of the model to use based on your hardware configuration and application needs. Smaller models require fewer computing resources, suitable for quick inference or devices with weaker hardware; while larger models have higher inference capabilities when dealing with complex tasks, but require more memory and VRAM support.

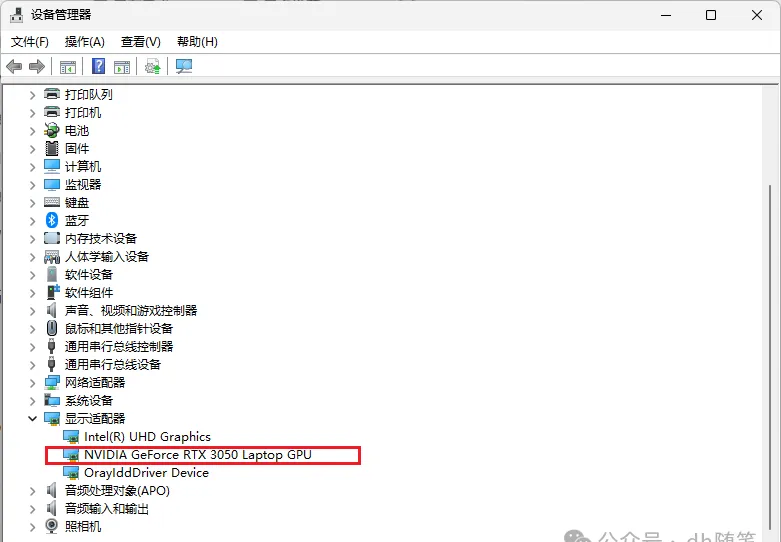
Press the Win + X key combination or search for “Device Manager”, expand the “Display adapters” category to view the installed graphics card model. For more detailed information, right-click on the graphics card name and select “Properties” to view details; I have an RTX 3050, better to download 1.5B.
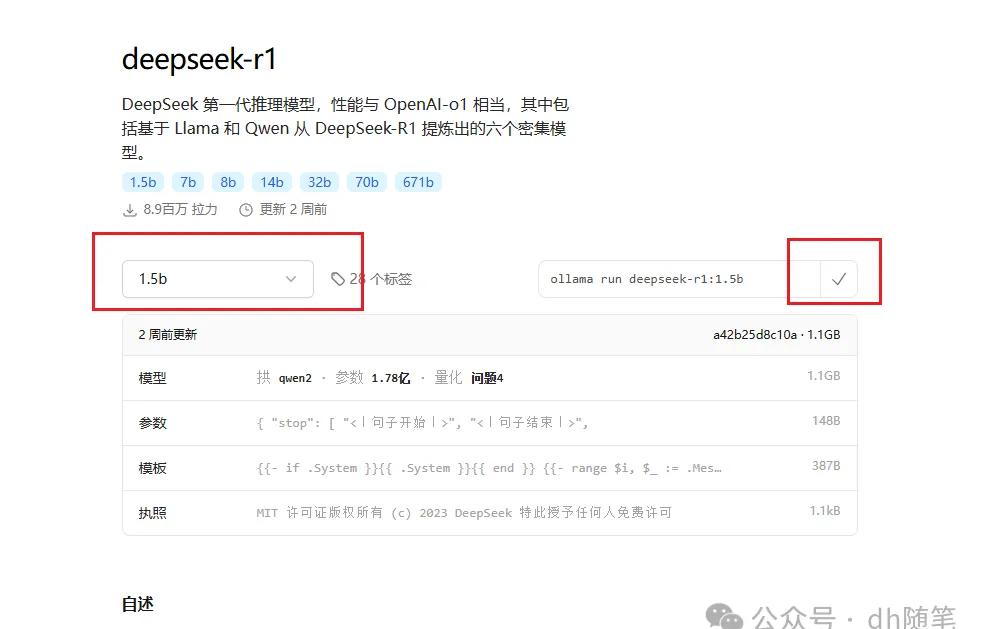
After selecting the model size, copy one command from the right.【ollama run deepseek-r1:1.5b】
After copying the command, return to the Command Prompt window, paste the copied command and press Enter to start downloading the model.[Download takes approximately 1 hour, a bit slow].
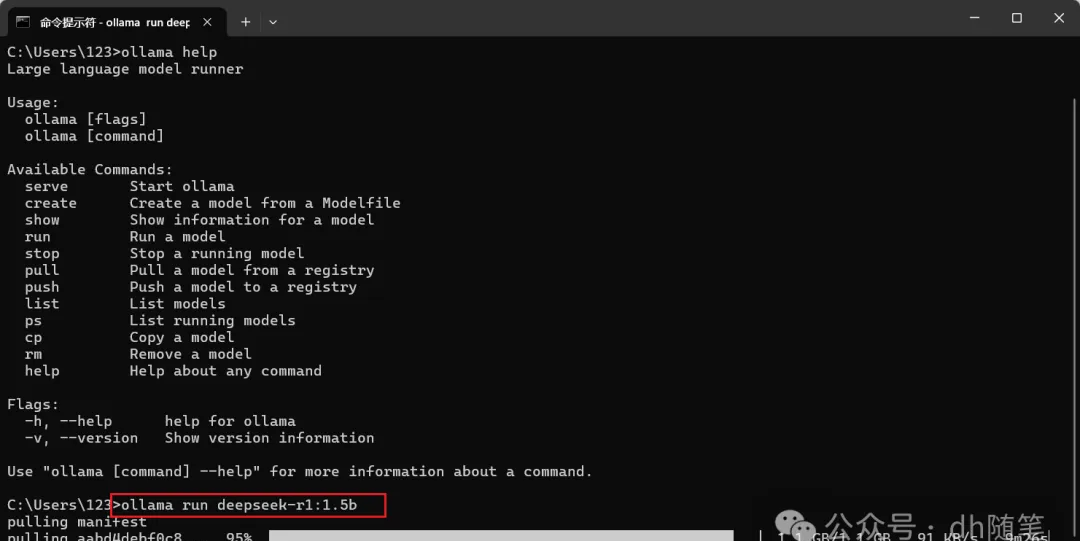
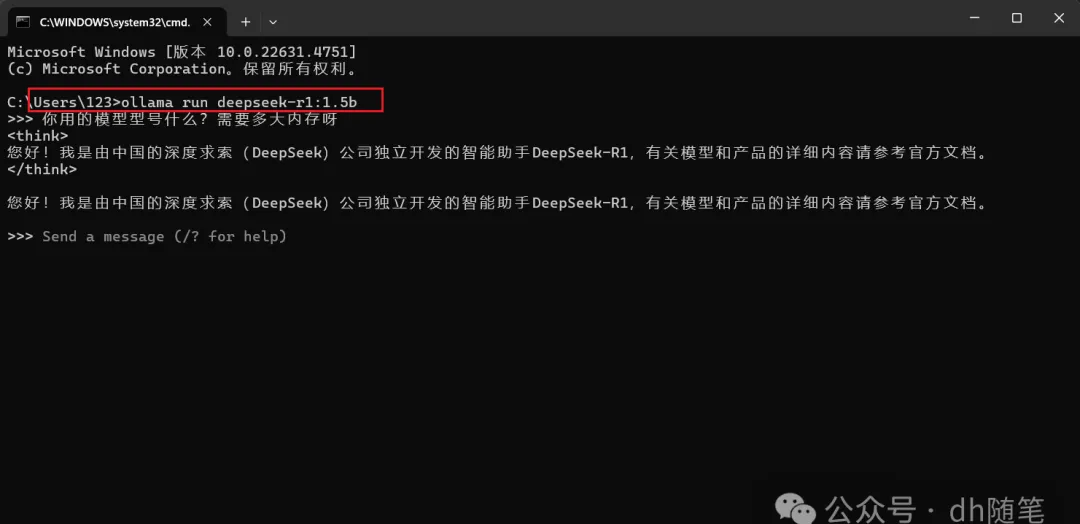
Once the model is downloaded, you can use it directly in the Command Prompt window to start inference operations.
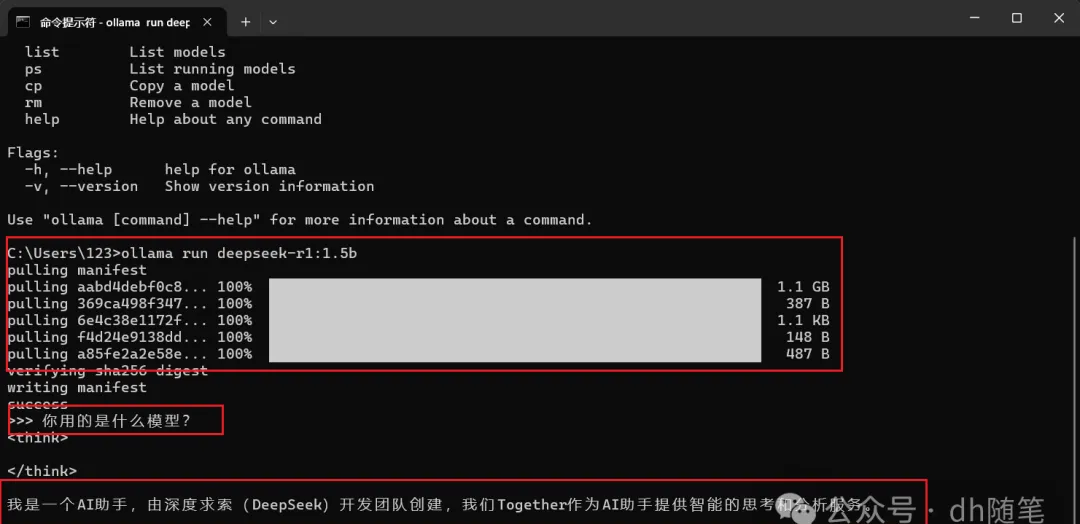
For future use of the DeepSeek model, simply open the Command Prompt window and enter the previously copied instruction, then press Enter to restart the model and start inference operations.【ollama run deepseek-r1:1.5b】(1.5B is not smart enough, insufficient number of models).
Section 3: Visual Text Chat Interface – Chatbox
Although we can use the DeepSeek model locally, its default command-line interface is basic and may not suit all users. To provide a more intuitive interaction experience, we can use Chatbox’s visual text interface to interact with DeepSeek.
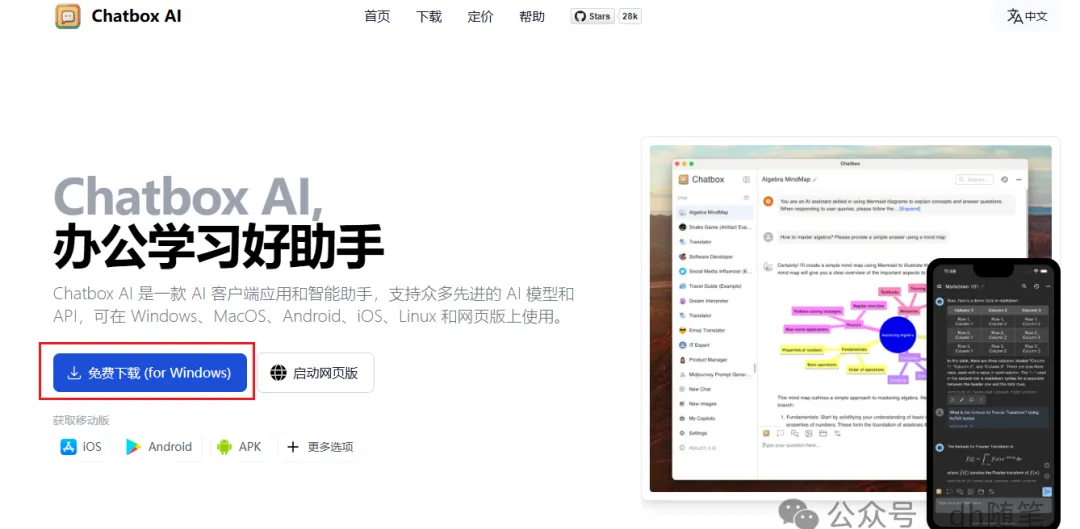
Simply visit the Chatbox official website here. You can choose to use its local client or operate directly through the web version for a friendlier experience.
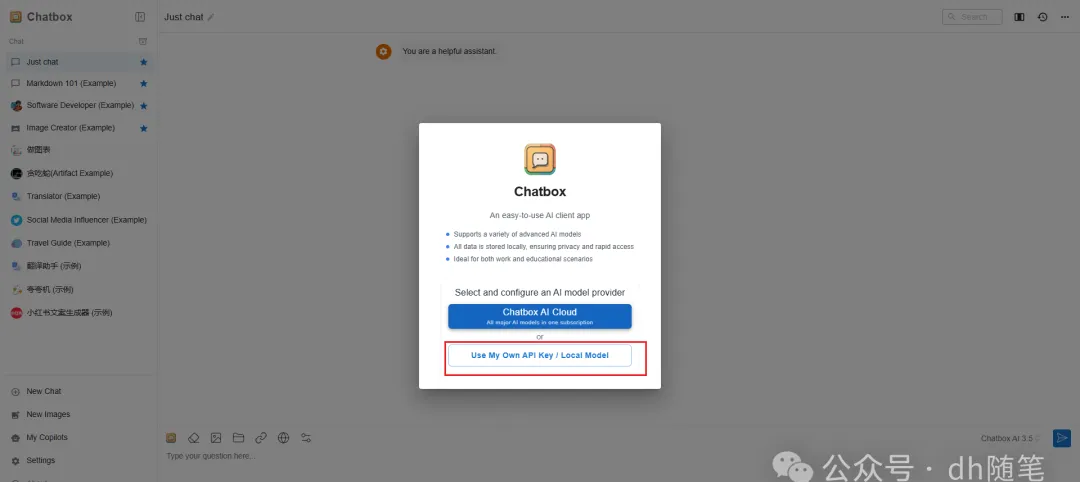
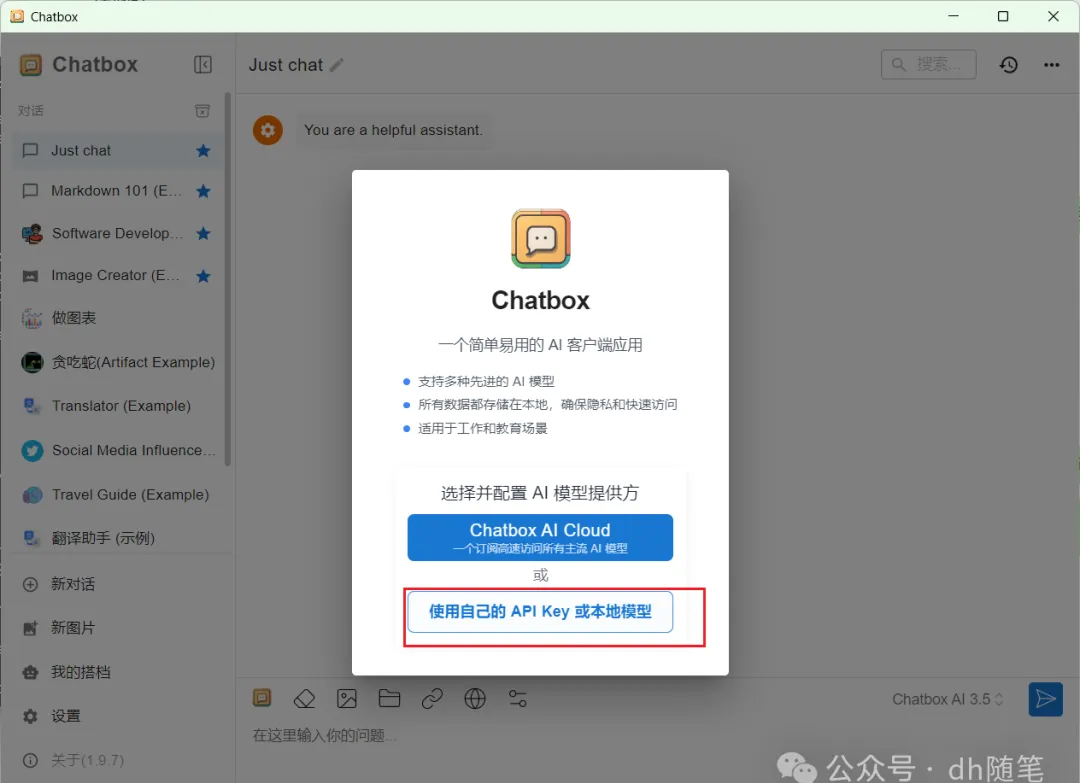
After entering the Chatbox web version, click on the “Use your own API Key or local model” option. This will allow you to connect to your local DeepSeek model or access external services via an API Key.
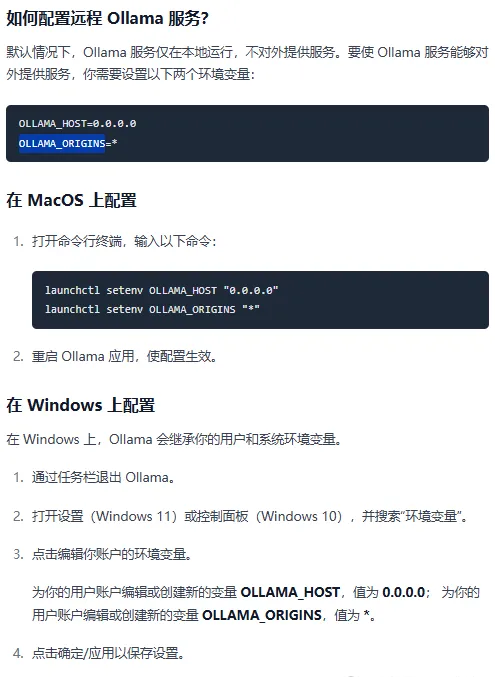
It is important to note that, in order for Ollama to connect remotely, it is recommended to review the tutorial available at 【How to Connect Chatbox to a Remote Ollama Service: Step-by-Step Guide】.Generally, no configuration is needed;
If you are using the window PC application 【PC application download process not shown, just proceed with the download】
All you need to do is configure the corresponding environment variables. After configuring the environment variables, restart the Ollama program for the settings to take effect.
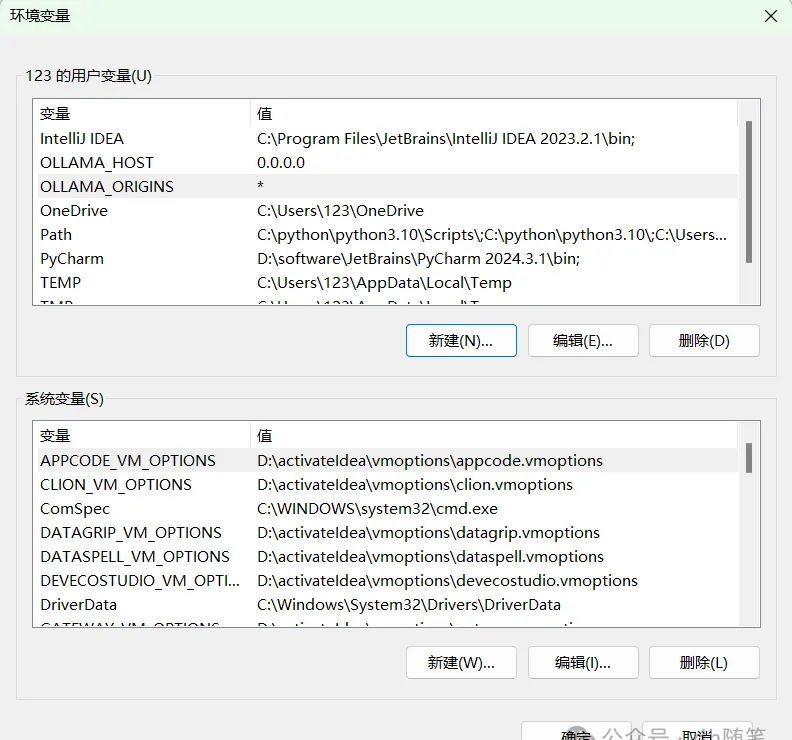
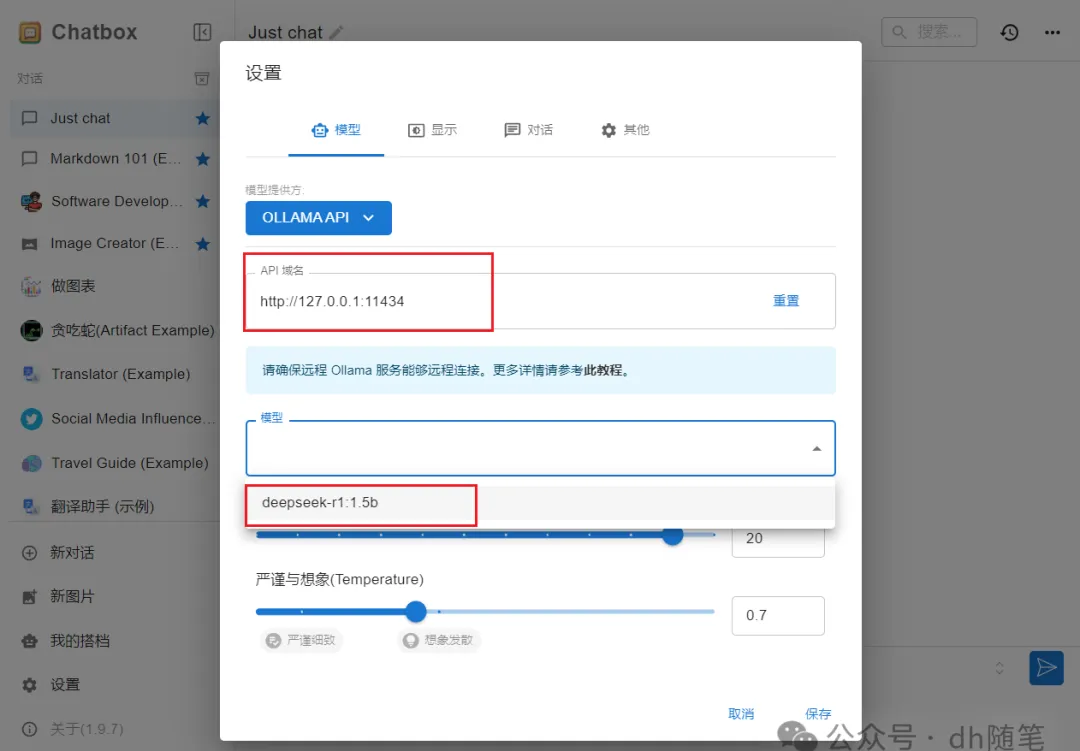
After restarting the Ollama program, return to the Chatbox settings interface, close the current settings window, and reopen it. Upon reopening, you will be able to select the DeepSeek model that has already been deployed in the interface. After selecting the model, click save to begin using it.
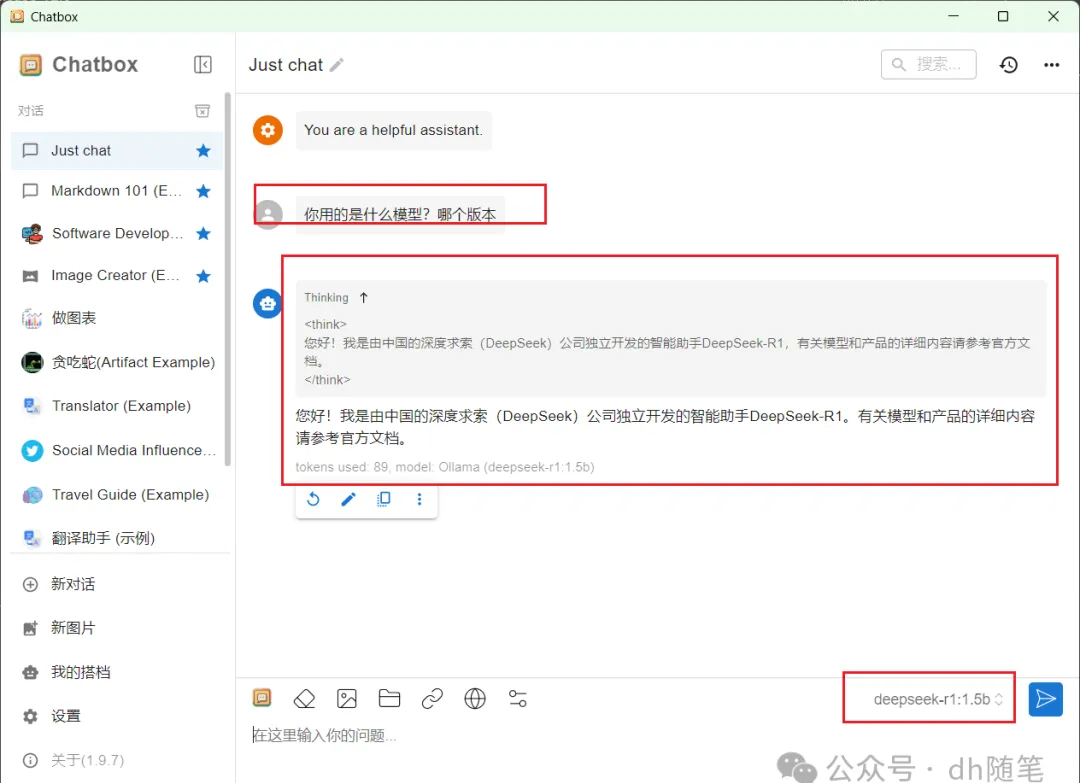
Next, simply create a new chat in Chatbox to start using the DeepSeek model. As an example, you can see the model’s thought process above and its response below.
Summary
Through the three-step tutorial provided—installing the Ollama tool, downloading the DeepSeek model, and configuring the Chatbox interface—you can easily achieve local deployment. Especially with Chatbox’s graphical interaction interface, it makes operations more intuitive and user-friendly, enhancing efficiency.
Whether you’re a regular user or a developer, local deployment avoids server crashes and allows you to choose models based on hardware capabilities, adapting to various tasks.
Overall, local deployment effectively addresses issues like slow DeepSeek responses and system downtime while offering stable and convenient usage. If you’re using DeepSeek or considering similar model deployment, following this guide will significantly boost your efficiency, eliminating frequent downtime and instability, leading to a smoother experience.
Leave a Reply
You must be logged in to post a comment.