
 Anqingh:Personal Home
 Personal Column:[Computer Network][MyBatis Series]
About Me:A fun and sleepy INTP student who looks forward to sharing knowledge with more people sincerely.

Table of Contents
 Project Development Environment
3. Creating the User Entity Class
 4. Registration – Persistence Layer
 Plan the SQL statements to execute
Design interfaces and abstract methods
5. Registration – Business Layer
 5.1.1 RuntimeException Exception
5.1.2 Username Already Taken Exception
5.1.3 Data Insertion Abnormality
5.2 Design Interfaces and Abstract Methods
6. Registration – Control Layer
6.4 Control Layer Optimization Design
7. Registration – Frontend Page
 Project Basic Introduction
Project Functionality
This project mainly implements the following functions: login, registration, hot products, user management (password, personal information, avatar, shipping address), shopping cart (display, add, delete), and order module.
Development Sequence
Registration, login, user management, shopping cart, products, and order modules.
Development of the Module
- Persistance layer development: design SQL statements based on frontend page settings and configuration.
- Business layer development: control core functionalities, perform operations, and handle exceptions.
- Controller layer development: receive requests and process responses.
- Frontend development: connect backend using JavaScript, jQuery, AJAX, etc.
Project Development Environment
1. JDK: Version 1.8 or higher
2. Maven: Configured in IDEA, version 3.6.1
3. Database: MySQL, version 5.1 or higher
4. Development platform: IntelliJ IDEA
Setting Up the Project
1. Project name: store (indicating a mall)
2. Structure: com.cy.store
3. Resource files: located in the resources folder (static and templates)
4. Unit tests: test.com.cy.store
5.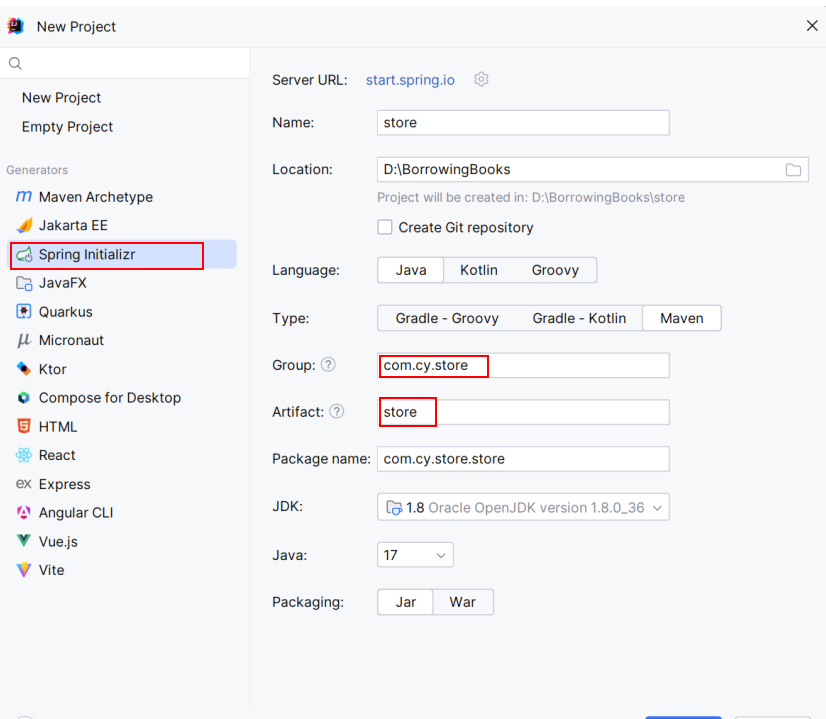
6. After clicking next, select the following three JAR packages first.
(1) WEB: Spring Web (for front-end and back-end connection)
(2) SQL: Mybatis Framework
(3) SQL: MySQL Driver (for MySQL database driver)
7. Configure the database source information in the properties file
8. Create a store database
9. Test the connection:
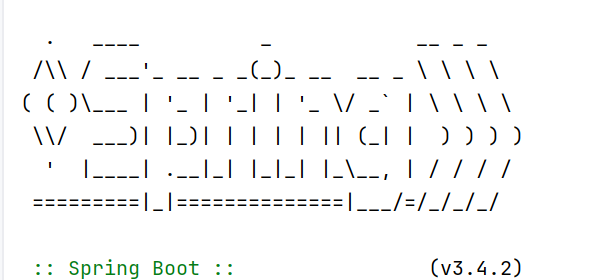
- Start the Spring Boot main class and check if the corresponding Spring graphical output appears
In src->main->java->com.cy.store->StoreApplication, start the main method, and you will see the following graphic upon successful startup:
- Test the database connection in the unit test class to see if it loads normally
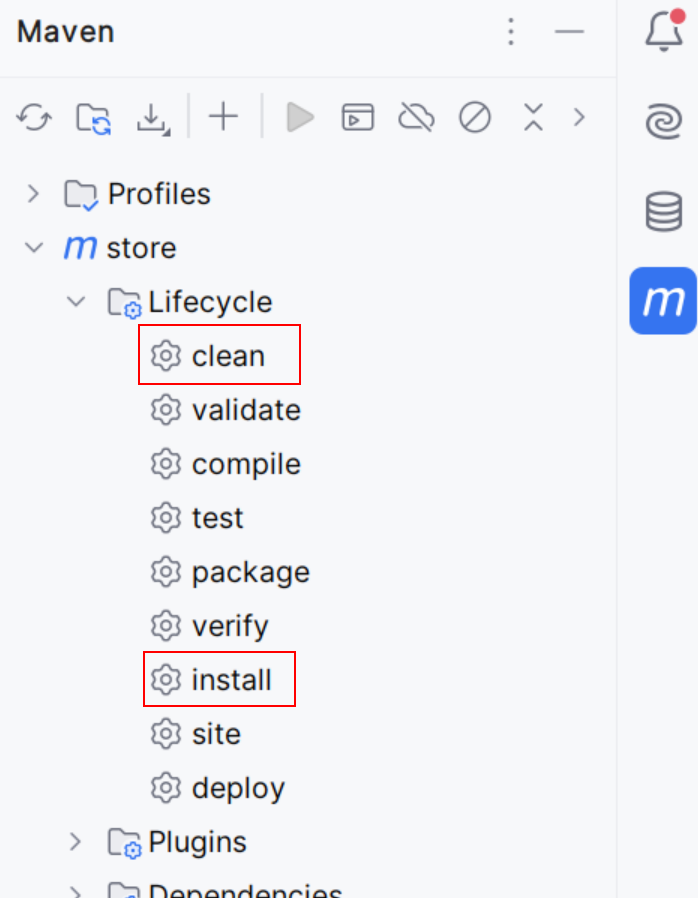
- Clearing Idea cache
- Double-click clean and install again after clean
- Rebuild project
- Restart IDEA and operating system
- Salt value: Used during user registration to encrypt the password, which is crucial.
- Gender: Uses Arabic numbers 0 and 1 to represent gender because it’s difficult for the front-end to display text-based options. Gender is a radio button, so an integer is easier to operate and judge.
- Delete status: Most vendors do not implement true deletion; they only perform a check during login. If it is not 0, it indicates that the user has been deleted.
- Four basic fields are essential in any table, serving as core components of the entity class.
- Clean and reinstall the project under Maven configuration
- Clear cache in the project’s file settings
- Rebuild the project under build options
- Restart IDEA
- Restart the computer
If the following image of Hikari appears, it indicates successful connection. Hikari is used to manage database connections.

10. Can static resources of the project be loaded normally? All static resources are copied under the static directory.
Note: IDEA has poorer compatibility with JS code, and sometimes JS code cannot be loaded properly even if written.
User Registration
1. Choose Data Table
2. Create t_user Table
[/crayon]
created_user VARCHAR(20) COMMENT ‘Creator’,
created_time DATETIME COMMENT ‘Creation time’,
modified_user VARCHAR(20) COMMENT ‘Last modifier’,
modified_time DATETIME COMMENT ‘Modification time’,
3. Create User Entity Class
Create BaseEntity
The entity base class stores the common fields for all tables.
Create User Entity Class
4. Registration – Persistence Layer
Operating the database through MyBatis. The process of developing with MyBatis.
Plan the SQL statements to be executed
1. User registration functionality is equivalent to performing an insert operation on the data.
2. When a user registers, we first need to check if the current username already exists; if it does, registration cannot proceed. This is essentially a query statement.
Design interfaces and abstract methods
1. Define the Mapper interface. Under the project directory structure, first create a mapper package, then within this package create mapper interfaces according to different functional modules. Create an UserMapper interface. In this interface, define the abstract methods for these two SQL statements.
[/crayon]
DATABASE INTERACTION
1. Define the Mapper interface methods for database operations.
2. Configure Mapper interface file location in the main application class
Write Mappings
1. Define XML mapping files and associate them with corresponding interfaces. All mapping files need to be placed under the resources directory. Create a mapper folder in this directory, and store Mapper configuration files there.
2. Create mapping files corresponding to interfaces, keeping file names consistent with interface names. Create a UserMapper.xml file.
3. Configure SQL statements corresponding to methods in the interface using tags for insert/update/delete/select operations, which correspond to SQL’s CRUD actions.
4. Register the location of the mapper files in the corresponding properties configuration file. Add the following code to the application.properties file:
5. Unit testing: After each independent layer is completed, unit test methods need to be written to test the current functionality. Create a mapper package under the interface in the test package, and create a persistence layer test in this package.
5. Register – Business Layer
5.1 Planning Abnormalities
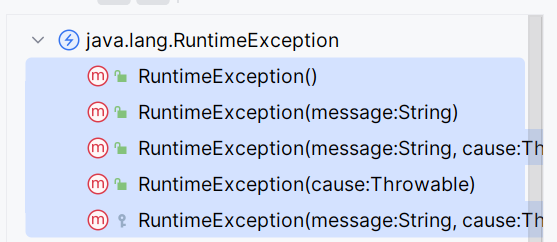
 5.1.1 RuntimeException Exception
As a subclass of this exception, then define specific types of exceptions to inherit from this exception. The base class for business layer exceptions, ServiceException exception. This exception inherits from RuntimeException. Establishing the mechanism of exceptions.
Based on the different functions of the business layer, define specific types of exceptions in detail and uniformly inherit from the ServiceException exception class.
5.1.2 Username Already Taken Exception
When a user registers, they may encounter an error where the username is already taken, resulting in a UsernameDuplicatedException exception being thrown.
Press alt+insert to open the shortcut menu and select the first five options as shown in the figure:
5.1.3 Data Insertion Exception
When performing a data insertion operation, the server and database crash. An exception generated during the ongoing insertion process: InsertException exception.
5.2 Design Interfaces and Abstract Methods
1. Create an IUserService interface in the service package.
2. Create a service implementation class UserServiceImpl that implements the interface and overrides the abstract methods.
3. Create a UserServiceTests class in the unit test package, and add unit testing functionality to this class.
6. Registration – Controller Layer
6.1 Create Response
Status code, status description information, and data. This functionality is packaged in a class, which is returned as the method return value to the browser.
6.2 Design Request
Based on the current business functional modules, design the request.
Request path: /users/reg
Request parameters: user user
Request type: POST
Response result: JsonResult<void>
6.3 Handle Request
1. Create a corresponding controller class UserController that depends on the interface of the service layer.
Optimization Design of Control Layer
Extract a parent class from the control layer and unify handling of exception operations in this parent class. Write a BaseController class to uniformly handle exceptions.
[/crayon]
public static final int OK=200;
@ExceptionHandler(ServiceException.class) //Used to uniformly handle exceptions thrown
public JsonResult<Void> handleException(Throwable e){
JsonResult<Void> result=new JsonResult<>(e);
if(e instanceof UsernameDuplicatedException){
result.setState(4000);
result.setMessage(“Username is already in use”);
}else if(e instanceof InsertException){
result.setState(5000);
result.setMessage(“An unknown exception occurred during registration”);
}
return result;
}
}
Reconstructed the reg() method.
7.Registration – Frontend Page
1. Write the method to send requests in the register page, and complete it by clicking events. Select the corresponding button (using $(“selector”)), then add a click event, and use the $.ajax() function to send an asynchronous request.
2. JQuery encapsulates a function called $.ajax(), which uses AJAX to asynchronously load related requests through object invocation. AJAX treats a specific part of the code as an independent unit. It relies on the XHR (XmlHttpResponse) object provided by JavaScript, which packages this functionality.
3. Usage of ajax(). A method must be passed as a parameter to the function, with a pair of curly braces representing the method body. AJAX receives multiple parameters, separated by commas between them, and each parameter group is separated by a colon. The components of a parameter include the parameter name (which cannot be arbitrarily defined) and its value, which should be represented as a string. There is no required order for declaring parameters. Syntax structure:
4. The meaning of the parameters in the ajax() function:
| Parameter | Description |
|---|---|
| url | Identifies the request address (URL), excluding any parameter list content. Example: url:”localhost:8080/users/reg” |
| type | Request type (GET and POST request types). Example: type:”POST” |
| data | Data submitted to the specified URL address. Example: data:”username=tom&pwd=123″ |
| dataType | Data type of the submission. Typically specified as JSON type. dataType:”json” |
| success | When the server responds normally to the client, the success parameter method is automatically called, and the returned data from the server is passed to this method’s parameters. |
| error | When the server fails to respond normally to the client, the error parameter method is automatically called, and the returned data from the server is passed to this method’s parameters. |
5.JavaScript code can be independently declared in a separate JavaScript file or within a script tag.
[/crayon]
6.JavaScript code fails to be properly parsed and executed by the server, manifested by no response when clicking buttons on the page. Solutions:
Leave a Reply
You must be logged in to post a comment.